Tuesday 7 June 2016

Evaluation

My two years spent studying specialist makeup at West Thames College has been harder but more rewarding than I thought.

 I began studying the basics of fashion makeup, which I thought was imperative to building my skills as a confident makeup artist in the different aspects of makeup varying from fashion to theatre. These lessons enabled me to broaden my knowledge of the fashion industry and its ever changing trends in hair and makeup. It has left me with a keen interest in fashion makeup and I will continue to research the different looks to keep my skills and makeup applications fresh and up to date.

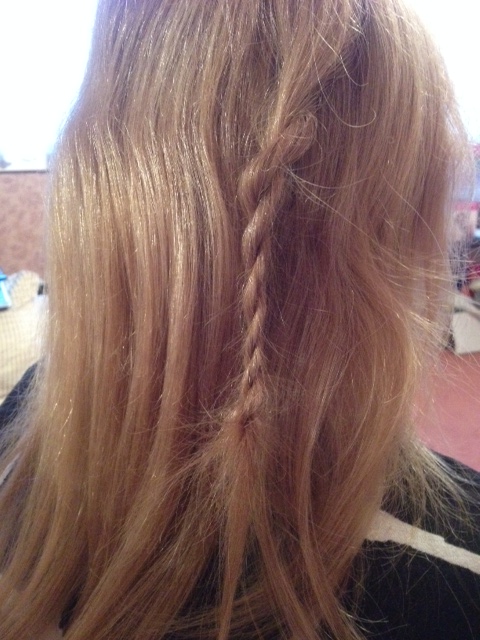
Period hair and makeup was a challenging yet rewarding learning experience and I am grateful to have been taught the technicalities of period hair by Samantha Smart, who made each hair style look easy! I struggled the most with period hair but plan to utilise my time once I have graduated to practise all the styles more, as Britain is known for its period dramas in TV and theatre.

Another challenging makeup technique learnt was theatrical makeup, suitable for the stage. This very specific type of makeup application ranged from ballet makeup and aging makeup to making and applying bald caps. My passion for theatrical makeup as well as amazing teaching by Tanya Noor, enabled me to enjoy and pass this unit of work!

My favourite skill learnt and unit of work completed was learning all of the different aspects of hair and makeup suitable for TV and film, as it varied so much and encouraged me to look at time periods in depth to really capture a character and portray them accurately to the setting, time period and use application techniques suitable for the screen.

Other engaging units of work included body painting and special effects makeup. They both required knowledge of anatomy and health and safety, which is imperative when working in this industry, as the models as well as my own safety, is paramount in getting good results. West Thames were always very adamant that health and safety was top priority, which has disabled me from picking up any bad habits and has allowed me to apply health and safety checks naturally.

I felt I excelled in most units as I enjoyed leaning about them all so much. I am most proud of my character design projects from theatre and film and TV hair and makeup lessons the most and I am so proud of the characters I created not only through hair and makeup but from in depth research of time periods and other productions. My theatrical character project saw me create a character suitable for the stage incorporating a bald cap. I decided to incorporate theatrical aging techniques too and recreated the character of Dr Coppelius as I saw him, after in depth research. Another character I created was for TV and film. I created Fanny Wagtail, a prostitute from the 18th century. I believe both character makeup’s were marked as distinctions due to my in depth research of character traits and time periods as well as learning application techniques learnt in class.

West Thames has given me the chance to work at London Fashion Week and on the set of Mr Selfridge, which were not only amazing experiences but allowed me to gain an understanding of what to expect including early starts, call sheets and etiquette.

From here, I would love to begin working as an assistant on set of a drama series, sitcom or soap and feel prepared for this due to work experience and lessons in understanding call sheets and filling out continuity sheets. I am also interested in adding more artistic images to my portfolio and gaining work experience in the theatre. I believe my ongoing passion for creative makeup and broad teaching of industry techniques will ensure a successful career within the industry that I am so ready for.


I would like to thank my tutors Emma Croombs (who was always so helpful with tips about working on set), Magdelana Sprenger (who taught us all about sfx products and the  importance of realism when creating wounds), Samantha Smart (who is a hair wizard), Branka Vorkapic (who amazed me with her brush work), Denise Delaney (who was always so encouraging and passionate about all of our designs) Tanya Noor (who made the hardest theatrical makeup applications look easy) and last but not least, Fiona Heath (who spoke about art in all forms so passionately). 


The Final Piece- The Show... Exodus

So came the day of the show where I would exhibit my final design in a choreographed catwalk show. In this post, I will note any changed I made to the makeup, hair and costume design and evaluate how successful my piece was as a whole.

Makeup application
The only changes I made to the makeup on the day involved the snow decoration on the face and hair. Instead of only using snow paste, I applied artificial snow and silver leaf on top to add more texture. I thought the silver leaf would add a pop of colour that would match the mirrored pieces on the top piece well.

Hair
As I was unaware of the exact length and texture of my model’s hair, I had to wait until the day of the show to know exactly what I was doing. However, I was prepped for all lengths and thicknesses and had noted designs for each type in a previous blog post. My models hair turned out to be shoulder length and very, very fine, so I could not add too much height to it. Due to this, I opted for the design which incorporated backcombing sections of the hair to make the hair look knotted. I tried this and did not like it, so I opted for the idea which incorporated twist. I twisted random sections of hair and backcombed the bottom section to hold the twist in place. I really liked this and thought it made the hair look like icicles.

Costume
As the costume was made to measure to my model, I did not have to change anything!! Both the top and the skirt fit her perfectly.


Overall, I am really pleased with the whole look, including my models performance. I told her to walk down the catwalk slowly with the belief she was better than everyone else to fit the snow queen character and she performed beautifully, blowing artificial snow out of the palms of her hands at the end of the runway. I would not change a thing about my design and could not be prouder.


The Final Assessment Photographic Shoot- Evaluation

On the 26th May, I completed an almost full run through of the final hair, makeup and costume design. The only elements of the design I did not include were the false nails, as they were not completed in time and the thorn prosthetics and fullers earth. I did not include the thorn prosthetics as they are quite delicate and I did not want to risk damaging them before the final show. I used a different model to the one I have booked for the final show.

 Makeup plan
Prep skin
·         Block brows
·         Apply white aqua colour over brows
·         Apply eye makeup- all shadows, white eye liner
·         Apply base makeup
·         Set
·         Paint lashes white
·         Apply white liner again
·         Apply false lashes- top and bottom
·         Apply lip
·         Apply snow paste to forehead and around eyes
·         Dot aqua colour onto eyes and lips

Evaluation of makeup
I am very pleased with the whole makeup look I deigned and think it turned out better that I expected. After a previous trial which I did on myself resulted in the snow paste mixing with the foundation and pink tones blended onto the face, I did not apply any foundation to the areas where I would late be adding snow paste. I also applied a little less pink lip stick onto the cheek bone area and pressed powder into it to help set it into the skin. I found doing this worked and the snow paste stayed white throughout the application.
I really like all the colours used and the small dot details with the aqua colour, as well as the lip shape, which I will not change.

What I will change
I think I may add a bit of artificial snow onto the areas where the snow paste will be added to add a bit more texture. I will also take it further into the hair.


Hair plan
·         Brush hair through
·         Straighten
·         Brush hair back
·         Back brush with all hair away from face
·         Place headdress and secure in place
·         Pull 1 section of hair from each side round the headdress to cover grips
·         Apply snow paste

Evaluation of hair
I am pleased with how the hair looked in relation to the theme and costume design. I like the way the straight hair ends fell between the icicles on the shoulders of the costume so I am pleased I opted to keep the hair worn down. I also think having the hair poker straight coincided nicely with the straight lines of the headdress and the icicles.

What I will change
Dependent on my models hair on the day, I may backcomb the top section of the hair directly behind the tiara to help disguise the back part of it.


Costume plan
·         Apply pros-aide to shoulders and neck
·         Apply pros-aide to shoulders and neck of costume
·         Lay onto skin
·         Apply pros-aide to sides of costume and skin
·         Step model into skirt

Evaluation of costume
I found working with the tiara and skirt easy and will not have to change anything to my design. However, I am a little worried about the top piece I have made as it did not fit the model I used for the photo shoot as she was bigger than the model I have booked for the final show. Due to this, I have asked my model to send me some specific measurements from her shoulders so I can alter the piece in time if need be. 


Budgeting and Costs

For my final design, I aimed to spend around £80 on materials and was willing to pay around £100+ for a model for the final show. Below I have compiled a list of the items I have purchased and money spent.


Hot glue- £10
Artificial snow- £5
Glass- £2.99
Diamantes- £0.89
Netting- £20
Top lashes- £10.50
Bottom lashes- £10.50
Snow paste- £6
Cellophane- £1.49
Petal veiners- £5.89
Nails- £1.99
Silver leaf- £1.50
Elastic-£1.50
Postage and packaging for all items- £15

Total= £93.25

Model- £150

Grand total- £243.25


Hair Design- Ideas and Practise

As I am still unaware of who my model will be, I am left unsure about what to do with the hair. Due to this, I have decided to leave the hair quite simplistic, so that I don't feel unprepared by the time I find a model.

I have listed an idea for each hair type, although I am looking for a blonde model.

Short hair- Finger wave with fullers earth and artificial snow outlining the curves that fall onto the forehead.

Mid length- Add texture and shape into the hair, twisting two sections around one another then back combing the ends to make the hair look slightly knotted, keeping the hair looking natural. Bring two sections of hair back , covering the headdress clips.

Long- Add loose waves using heated tools, back comb hair at crown into a beehive. Add more texture into the hair by back combing the ends.

Fine hair- Use postiche brush and texturising spray to add depth, volume and texture into the hair.

Thick hair- Setting lotion and heated tools to keep the hair under control. Twist hair and backcomb ends.


I am also keen to add some of the snow paste into the hair, as it looks really good when applied to beards and eye brows in films such as Everest. I would like to carry it on from the face application, taking the product into the front part of the hair, then sprinkle on a small amount of artificial snow.


Makeup Practise

I then practiced this look on myself ahead of the assessment photographic shoot...


Creating the eye makeup
  • Apply spirit gum to eye brow and flatten with spatula
  • Apply powder to get rid of tackiness 
  • Brush white aqua colour over entire brow, flicking upwards
  • Line directly under brow with pink eye/lip pencil and blend with brush
  • Blend Ben Nye Brownberry into the line
  • Blend pink eye shadow and Mac blush in Melba into Brownberry
  • Blend silver shadow below and onto the entire top lid
  • Use pink pencil to line under eye
  • Fill in area with Brownberry
  • Highlight inner corner with Mac silver pigment
  • Line waterline with Kryolan white pencil
  • Brush white aqua colour onto top and bottom lashes 
  • Apply white lashes
  • Use spatula to spread snow paste over brows and up onto forehead and into hair line
  • Add artificial snow to snow paste 
  • Dot white aqua colour along inner part of eye
Problem Solving 

Whilst I was applying the snow paste, I noticed that it began to pick up the colour from the foundation and lipstick I had applied prior, as a base makeup. This resulted in parts of the now paste becoming stained pink and peach, so the next time I apply this makeup, I will avoid applying foundation to this area and set the pink part of the base makeup with a lot of powder. 


Creating the lip

  • Apply Kryolan rouge shade LC001 onto lip with finger- light application 
  • Slightly over line top lip- don't take line to corners of lip
  • Line bottom lip, taking the line slightly inwards 
  • Dot white aqua colour following natural lip line on top and bottom outer corners of lips

Makeup Designs... Face charts

After researching items that elate to my idea, including snow and ice, flowers, natural phenomena, fashion pieces and hair and makeup designs, I sketched a few makeup designs that were generated from my research. 
This look has a soft feel, incorporating a light eye makeup with shimmering silver linear highlights along the top lid along with a soft pink cheek and blended ombre lip. The pink tons compliment the pink rose/ watermelon snow theme while the white and silver tones reflect the snow/ice. I would use my MUF flash palette to create this look, as it is an easy makeup product to blend with bright colours.


This look is bolder than the first design and has more of an earthy/tribal feel. The bold pink tones on the cheek, chin and temples alongside the powerful eye makeup create a powerful look, while the white lip and eyebrows, enhanced with snow paste relate to the snow theme. I would brush spirit gum into the eyebrows to create texture before applying powder then panting over white aqua colour over them and the lip. I would then apply snow paste directly from the jar. 


This is the idea I have chosen to represent the snow/ice queen character for my final deign piece. I have chosen this design as I think it sit between being a powerful yet soft makeup look, just like snow. I have decided to use sow paste on the eyebrows forehead and just around the eye along with blending pink tones around it. The lips are also pink and are detailed with small white dots, as are the eyes. I have done this to look like snow while also adding a touch of tribal power to the look. 


Making the thorn prosthetics

I used air dry clay to sculpt the rose thorns. I began by rolling a small amount of clay between my fingers then squashing each side between my fingers until I had created a point at the top. I then used a sculpting tool to smooth the edges.


I then built clay walls around thorns and mixed together a plaster mixture (plaster of paris and water) and evenly coated each piece of clay with a small amount of the plaster mixture and blew it into the edge to remove any air bubbles. I poured over the rest of the plaster mixture and allowed it to dry.
Once the plaster had cooled and set completely, I removed the clay from it, revealing a plaster mould. I then filled it with layers of latex (drying and apply talc between each layer) until the moulds were completely filled.


Once the latex had dried thoroughly, I removed each prosthetic from the mould and then painted with pax that I made using pros-aide and acrylic paint. 


I then applied the prosthetics to my arm along with the fullers earth to see how the two elements looked together and I am really pleased with the look. 


Making the Costume... The Skirt

I purchased a large mosquito net online to act as the skirt for my costume. When it arrived, I cut out the centre and removed the wire from it. I then threaded elastic through the area which held the wire and stitched it together. Next, I cut the skirt to the correct length to fit my model, cutting diagonally around the sides and back to create a long train.
I then began to stitch each petal on one at a time, overlapping one another and continued this around the entire skirt.


Problem solving!
As I was sewing each petal on, overlapping the sides of the petals, I soon realised I would need far more than 300 home made petals to cover the entire skirt as I had planned and with each petal requiring 4 layers of latex, it soon became an impossible task. Due to this, I then decided to unpick all of the rose petals I had stitched and then re-stitch them back on more sporadically and without overlapping them too much. I focused most of the rose petals on the top to cover the models modesty and began to leave larger gaps between them the further down I went.
I also cut the train shorter to help with the petal placement and painted a few paper petals pink to fill in any smaller gaps. I then used pva glue to stick the edges of some of the petals together as thy folder over in some places due to the ruffling in the skirt.


To add the final details to the skirt, I layed it out and coated certain areas with watered down pva glue. I then sprinkled and pressed a mixture of artificial snow and silver leaf into the glue and allowed it to dry, concentrating on applying the snow to the top of the skirt and at the bottom to reflect natural snow fall. I added final detail with a few diamantes. 


Making The Headdress

I used the same method and materials that I had used to make the top to make the headdress. The only difference was how I applied the materials. Instead of sporadically drizzling the gelatine and hot glue over one another, I guided them upwards in straight lines. I did this to coincide with the icicles that sat on the shoulders on the top piece.


I used a plastic tray, which I coated with linear layers of gelatine. I then applied the same technique using hot glue and coated with a mixture of pva glue and glitter. To further decorate, I applied broken glass pieces, diamantes and artificial snow. Once dry, I gently picked up an end piece and pulled it away from the tray as I dusted talc underneath to stop it sticking to itself.


I then used hot glue to attach it to a plastic tiara I already had. 


Making the Costume... The Top Piece

After designing and sketching my costume that I intended to reflect an ice and rose theme, I began to bring the costume to life, starting with the top piece, which I had initially planned to create with gelatine, liquid latex and hot glue.

 The top piece

I purchased a female hanging mannequin and used this as my template to work from. I started by melting a gelatine and glycerine mixture in the microwave for 15-20 seconds and used the end of a paintbrush to pick up small amount of the melted gelatine and drizzled it in different directions over the entire mannequin body.

I continued to melt small amount of gelatine and use the same technique to drizzle it over the mannequin until the desired shape was created. I ensured to use more gelatine to cover the breast area so fewer gaps could be seen.


Once I was happy with the amount of gelatine I had applied, I then used the same sporadic drizzling motion to apply hot glue directly from my gun. I moved the gun quickly and in different directions, covering the gelatine. I decided to use hot glue over the gelatine as I think the glue looks more like ice in colour and texture when dry against the slightly yellow tone of the gelatine.

Once the hot glue had dried, I really liked the effect of the gelatine and hot glue combined and thought an icy effect was already created without using liquid latex to add more texture so I opted to not use it.


I then ensured that the hot glue was stuck securely to the gelatine by applying pva glue over the entire top piece. When I had previously carried out a practise test of combining the two materials, I noticed that the hot glue came away from the gelatine it was applied to when peeled off of the mannequin, so applying pva glue added the extra strength it needed. I also added silver glitter to the pva glue to add an extra effect and sparkle, which immediately made the piece look wintery and icy.
While the pva glue was still tacky, I sprinkled artificial snow over the entire piece and lightly pressed it into the glue. I then added further detail to the piece by sticking broken pieces of glass and diamantes onto it.


I then made another two gelatine pieces to fit onto the shoulders using the same drizzling method. Once the gelatine was dry, I used hot glue to attach my d.i.y icicles onto the small gelatine pieces. When they had adhered, I attached the pieces to the shoulders of the top piece I had made and added the same ice effects (hot glue, pva glue, glitter, artificial snow and glass and diamantes) to merge the pieces together with the top piece. 


I plan to adhere this piece of the costume onto the body using pro-aide, as it is a very strong glue. I plan to apply the flue to the shoulders, on the front of the neck and around the edge of the design as I did not want to apply too much glue to my model. I am hopeful that pros-aide will be strong enough to hold the piece on!

Making the Costume... The Rose Petals

Making the rose petals

I decided to make the rose petals myself as I knew exactly how I wanted them to look in my head and I also like to be as creative as possible with my designs.
My first thought was to make them with gelatine, using a silicone mould, however, I soon realised that the gelatine would be too heavy and also very fiddly to work with as it dries very quickly and requires to be heated. So I then decided to use liquid latex, as it is a product I am very used to working with. It is easy to work with, dries quickly with the help of a hair dryer and is a lightweight material.

To save myself a task, I decided to add acrylic paint to the latex, rather than colour the latex petals later with pax paint. I mixed together two different shades of pink (one light and one dark) and added liquid latex.


I then brushed on the darker shade along the bottom and around the edges of the petal veiner before blending the lighter colour into the centre.
Once that layer had dried, I lightly dusted with talc before apply another 3 layers. Once all the layers had dried, I dusted with more talc and peeled the latex away from the veineer. I then dusted the front of the petal with a peach powder to add a slight hint of colour and help merge the colours together. The powder also gave the latex the same velvety texture of a rose petal.  I went on to make 300 rose petals.


The petal  veiner

I sourced my silicone petal mould from a cake decorating store online. The mould is actually used to mould sugar and icing when decorating cakes and is called a veiner. I thought liquid latex would pick up the detail as well as icing and sugar does due to its runny consistency and it did work when tested. Phew!

Making the Costume... The Rose

I decided to make a whole rose to add to my piece (although I am not sure where I am putting it yet!) by combing paper rose petals I had made and painted with water colours.

I looked closely at some roses that I came across to see how closely they were placed together and the different shapes they folded in so I could make a realistic looking rose flower.


I began by wrapping a petal tightly around a cotton bud and securing in place using hot glue. I continued wrapping the individual petals around the cotton bud, loosening the tightness with each layer to make the rose look as if it is opening.


To add final touches to the rose, I brushed pva glue onto the edges of the petals and pressed artificial snow onto them, to fit the theme.


I may add this to the back of the hair or the back of the skirt...